Elasticsearch 未授权访问漏洞(Es未授权访问)
漏洞描述
ElasticSearch 是一款 Java 编写的企业级搜索服务,启动此服务默认开放 HTTP-9200 端口,可被非法操作数据。
复现
访问 IP:9200 显示 You konw,for Search 表示存在此漏洞

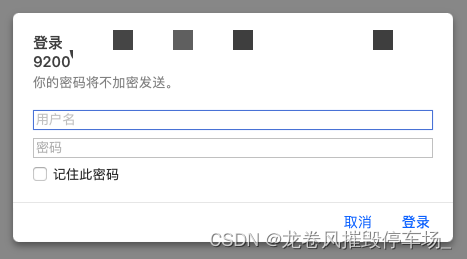
显示登录界面或访问不到的情况 证明不存在此漏洞
https://github.com/mobz/elasticsearch-head

查询所有 index, type:
localhost:9200/_search?pretty=true
http://ip:9200/_cat/indices
一般泄漏的文件都会出现在这个页面里面,可访问进行信息搜集
查询某个 index 下所有 type:
localhost:9200/films/_search
查询某个 index 下, 某个 type 下所有记录:
localhost:9200/films/md/_search?pretty=true
带参数的查询
localhost:9200/films/md/_search?q=tag:good
{ "took":7,"timed_out":false,"_shards":{ "total":5,"successful":5,"failed":0},"hits":{ "total":2,"max_score":1.0,"hits":[{ "_index":"film","_type":"md","_id":"2","_score":1.0, "_source" :
{  "name":"hei yi ren", "tag": "good"}},{ "_index":"film","_type":"md","_id":"1","_score":0.30685282, "_source" :
{  "name":"ma da jia si jia", "tag": "good"}}]}}
JSON 参数的查询
注意:query 和 term 关键字)
localhost:9200/film/_search -d '{"query" : { "term": { "tag":"bad"}}}'

http://localhost:9200/_rvier/_search
查看敏感信息了
http://localhost:9200/_plugin/head/web
管理界面
http://localhost:9200/_cat/indices
http://localhost:9200/_river/_search
查看数据库敏感信息
http://localhost:9200/_nodes
查看节点数据

使用 ElasticHD 工具进行远程连接可视化数据进行信息搜集
修复
1.限制 IP 访问,禁止未授权 IP 访问 ElasticSearch 9200 端口
使用 iptables 等服务器内嵌防火墙对访问 IP 进行限制

2.通过 ES 插件增加访问验证,增加验证后切勿使用弱口令
①shield插件,收费,暂不考虑。
②针对1.7.0版本之前的ElasticSearch,可采用elasticsearch-http-basic插件。
下载地址:https://github.com/Asquera/elasticsearch-http-basic/releases
elasticsearch-http-basic,安装在 plugins 文件夹下,config/elasticsearch.yml 中统一配置:
http.basic.enabled true
#开关,开启会接管全部HTTP连接
http.basic.user “admin”
#账号
http.basic.password “admin_pw”
#密码
http.basic.ipwhitelist [“localhost”, “127.0.0.1”]
#白名单内的IP访问不需要通过账号和密码,支持IP和主机名,不支持IP区间或正则。
③针对 elasticsearch2.x 以后版本采用 search-guard 插件
https://docs.search-guard.com/6.x-25/search-guard-versions
安装插件执行命令
./bin/elasticsearch-plugin install -b file:///path/search-guard-6-6.2.3-23.0.zip

config/elasticsearch.yml 中统一配置,末尾追
searchguard.ssl.transport.pemcert_filepath: certificates/esnode.pem
searchguard.ssl.transport.pemkey_filepath: certificates/esnode-key.pem
searchguard.ssl.transport.pemtrustedcas_filepath: certificates/root-ca.pem
searchguard.ssl.transport.enforce_hostname_verification: false
searchguard.ssl.http.enabled: true
searchguard.ssl.http.pemcert_filepath: certificates/esnode.pem
searchguard.ssl.http.pemkey_filepath: certificates/esnode-key.pem
searchguard.ssl.http.pemtrustedcas_filepath: certificates/root-ca.pem
searchguard.allow_unsafe_democertificates: true
searchguard.allow_default_init_sgindex: true
searchguard.authcz.admin_dn:
  - CN=kirk,OU=client,O=client,L=test,C=de
searchguard.enable_snapshot_restore_privilege: true
searchguard.check_snapshot_restore_write_privileges: true
searchguard.restapi.roles_enabled: ["sg_all_access"]

注:默认弱口令用户admin admin强烈建议修改默认密码
使用默认hash工具,生成hash串
elasticsearch-6.2.3\plugins\search-guard-6\tools
.\hash.bat -p newpwd
新密码生效
sgadmin.bat -cd ..\sgconfig -key ..\..\..\config\certificates\kirk-key.pem -cert ..\..\..\config\certificates\kirk.pem -cacert ..\..\..\config\certificates\root-ca.pem -nhnv -icl
使用 searchbox 获取 jestclient 的方式(basic的方式连接es)

    JestClientFactory factory= new JestClientFactory();
    factory.setHttpClientConfig(new HttpClientCofig.Builder("https://ip:9200").defaultCredentials(username,pwd).sslSockedFactory(getSslSockedFactory()));
    private static SSLConnectionSockedFactory getSslSockedFactory() throws Exception{
    SSLContextBuilder builder= SSLContexts.custom();
    builder.loadTrustMaterial(new Trustrategy(){
    @Override
    public boolean isTrusted(X509Certificate[] chain,String authType){
    return true;
    }
    });
    SSLContext sslcontext=builder.build();
    SSLConnectionSocketFactory sslsf = new SSLConnectionSocketFactory(sslcontext,new String[]{ "TLSv1","TLSv1.1","TLSv1.2"},null,new HostnameVerifier(){
    @Override
    public boolean verify(String arg0,String arg1){
    return true;
    }
    });
    return sslsf ;
    }
nodejs 使用用户名密码 (basic-auth) 连接 es
架设 nginx 反向代理服务器,设置 http basic 认证来实现 elasticsearch 登录认证
使用域名 配置转发
upstream es.nginx.com{
         server 127.0.0.1:9901 weight=1 max_fails=2;
         server 127.0.0.1:9902 weight=1 max_fails=2;
         server 127.0.0.1:9903 weight=1 max_fails=2;
         server 127.0.0.1:9904 weight=1 max_fails=2;
         server 127.0.0.1:9905 weight=1 max_fails=2;
}
location ~* / {
		proxy_set_header Host $host;
		proxy_set_header X-Real-IP $remote_addr;
		proxy_set_header X-Forwarded-For $proxy_add_x_forwarded_for;

		proxy_set_header Upgrade $http_upgrade;
		proxy_set_header Connection "upgrade";

		if ($host ~* es\.nginx\.com) {
			proxy_pass  http://es.nginx.com;
		}
}
配置账号密码访问模式
location ~* / {
		proxy_set_header Host $host;
		proxy_set_header X-Real-IP $remote_addr;
		proxy_set_header X-Forwarded-For $proxy_add_x_forwarded_for;

		proxy_set_header Upgrade $http_upgrade;
		proxy_set_header Connection "upgrade";

		#配置帐号密码
		auth_basic "login";#提示信息
		auth_basic_user_file /usr/local/nginx/conf/vhosts/password/es; #密码文件(填写绝对路径)
		autoindex on;

		if ($host ~* es\.sojson\.com) {
			proxy_pass  http://es.nginx.com;
		}
}
配置密码帐号文件
auth_basic_user_file 选项用于匹配密码文件
将密码按照一定规定进行编写 按照 unsername:passwd 格式填写进入密码文件内
vi /usr/local/nginx/conf/vhosts/password/es

关闭外网访问
修改config/elasticsearch.yml
#network.publish_host: 0.0.0.0
#networt.bind_host: 0.0.0.0
#network.host: 0.0.0.0
#只要配置这个即可
network.host: 127.0.0.1
#network.publish_host: 127.0.0.1
重启  Elasticsearch ,更保险,可再加上 iptables ,加上访问频率限制,防止暴力破解
原文链接:https://blog.csdn.net/weixin_52084568/article/details/129397581